Use Git Actions workflows to deploy
Create workflows
- In your program root path, create a file .github/workflows/deploy.yaml. The yaml file contents as follows: you can copy it to your own deploy.yaml.
name: VKube CI/CD
on:
  push:
    branches: [ "main" ]
  workflow_dispatch:   # ← Support manual trigger
jobs:
  deploy:
    runs-on: ubuntu-latest
    steps:
      # achieve complete commit hash
      - name: Get commit hash
        run: echo "COMMIT_HASH=$(git rev-parse HEAD)" >> $GITHUB_ENV
      - uses: certram/vkube-cli-action@v1
        with:
          vkube_config_file: './VKubefile.yaml'
        env:
          DOCKERHUB_USERNAME: ${{ secrets.DOCKERHUB_USERNAME }}
          DOCKERHUB_TOKEN: ${{ secrets.DOCKERHUB_TOKEN }}
          GHCR_USERNAME: ${{ secrets.GHCR_USERNAME }}
          GHCR_TOKEN: ${{ secrets.GHCR_TOKEN }}
          VKUBE_TOKEN: ${{ secrets.VKUBE_TOKEN }}
          VKUBE_COMMIT_HASH: ${{ env.VKUBE_COMMIT_HASH }}
Configure the VKubefile.yaml
You need to configure vkube token and the Dockerfile path, ensure they exist. In the deploy.yaml mentioned above, it is recommended to create the VKubefile.yaml in the root directory of your project. You can create the VKubefile.yaml in any directory, but you will need to change the path to VKubefile.yaml in the line vkube_config_file: './VKubefile.yaml' as shown below:
 jobs:
  deploy:
    runs-on: ubuntu-latest
    steps:
    - uses: publisher/vkube-deploy-action@v1
        with:
        vkube_config_file: './VKubefile.yaml' #这里根据自己的VKubefile.yaml的位置来填写
        env:
          DOCKERHUB_USERNAME: ${{ secrets.DOCKERHUB_USERNAME }}
          DOCKERHUB_TOKEN: ${{ secrets.DOCKERHUB_TOKEN }}
          GHCR_TOKEN: ${{ secrets.GHCR_TOKEN }}
          VKUBE_TOKEN: ${{ secrets.VKUBE_TOKEN }}
./ represents the root directory of your project.
(Note: If the VKubefile.yaml is located in a subdirectory, such as config/VKubefile.yaml, you should update the path in the command accordingly)
Configure the secret
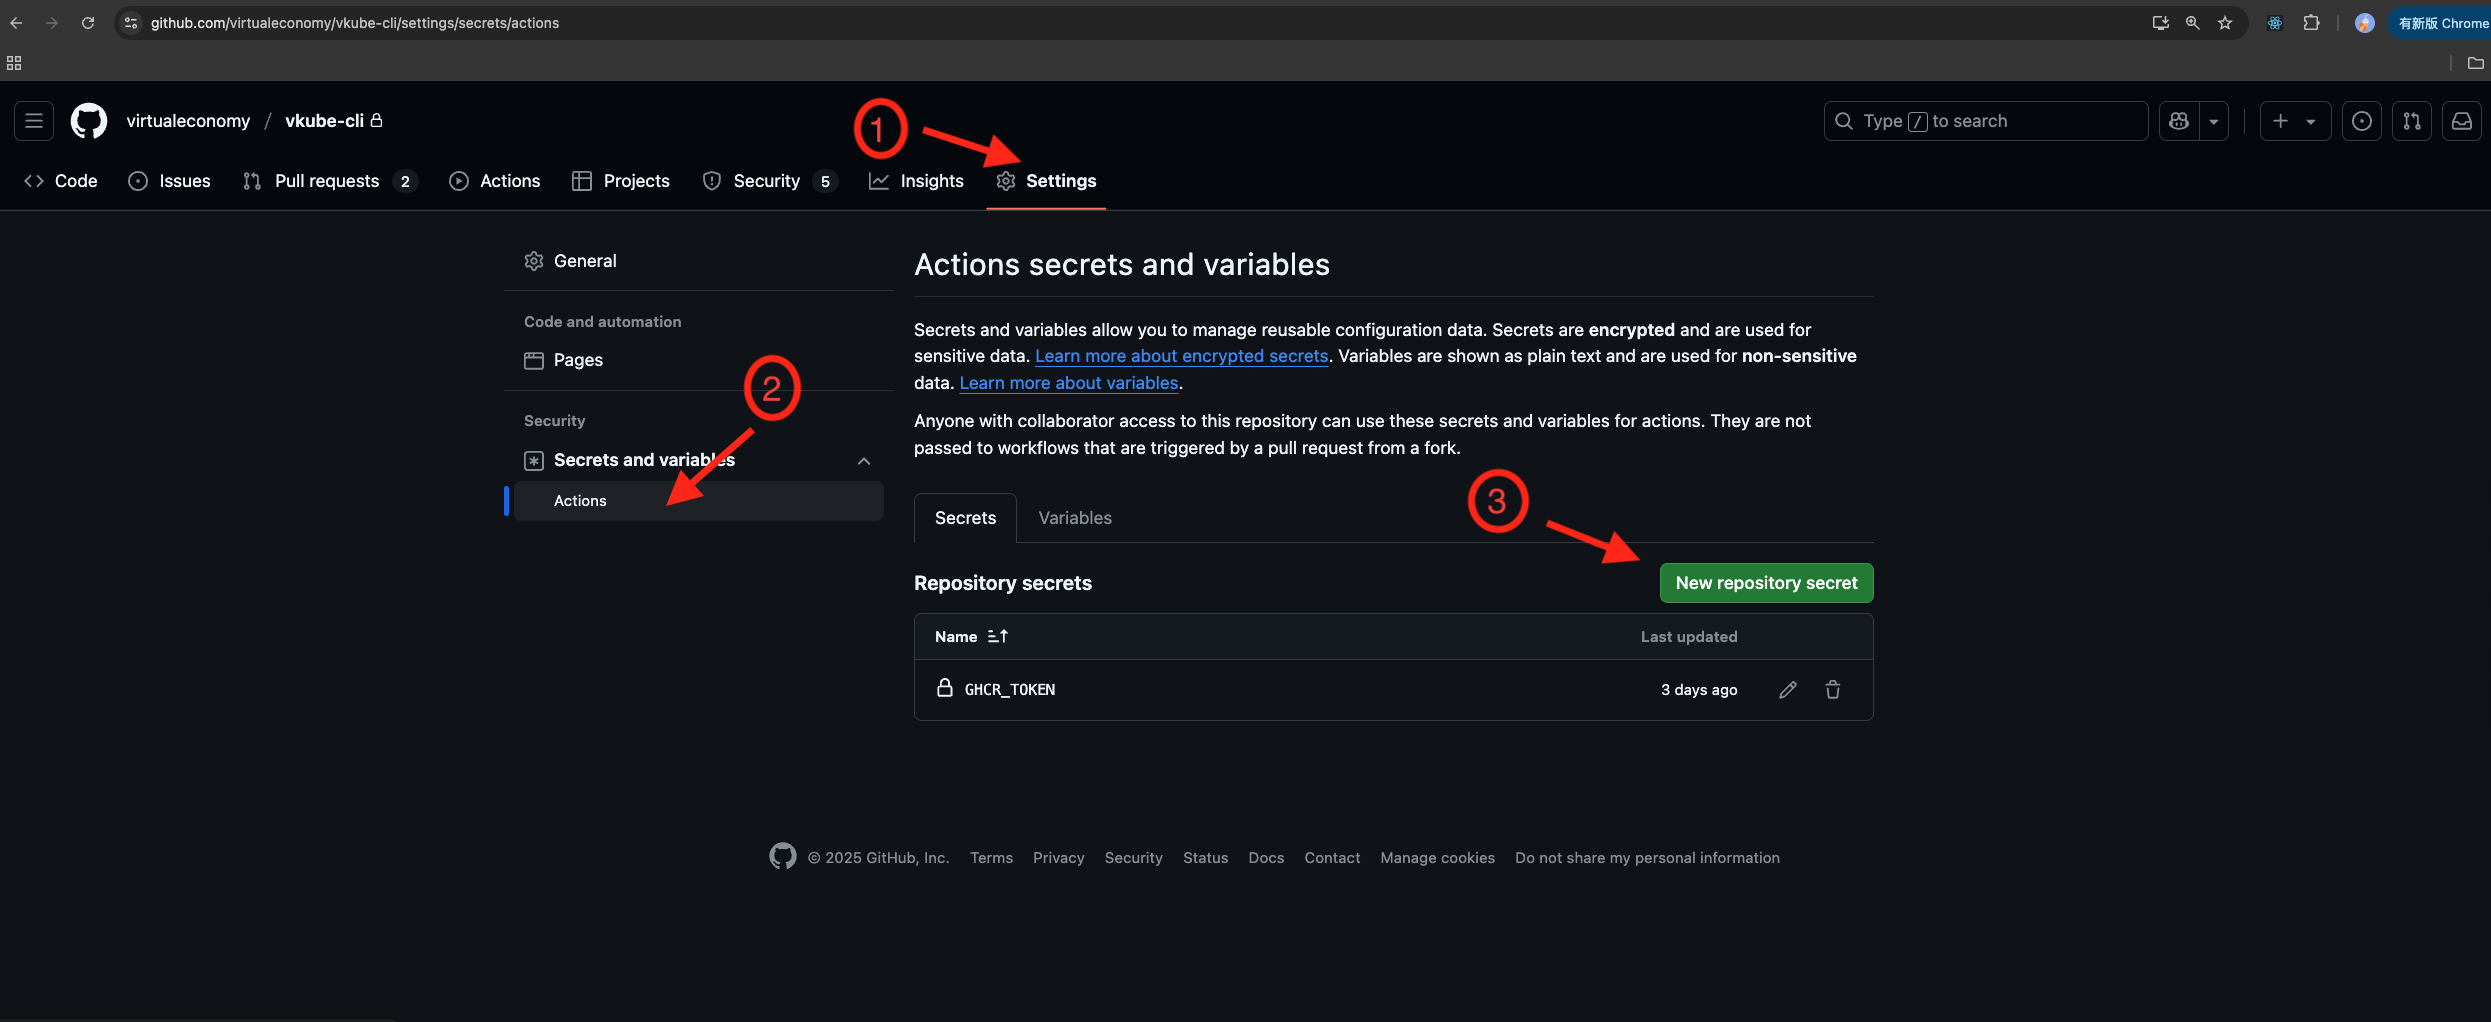
Go to the GitHub repository of your project, and add the following secrets in the GitHub repository's Settings → Secrets.
If you set the imageRegistry to "ghcr", then you need to configure the GHCR_TOKEN like follows:
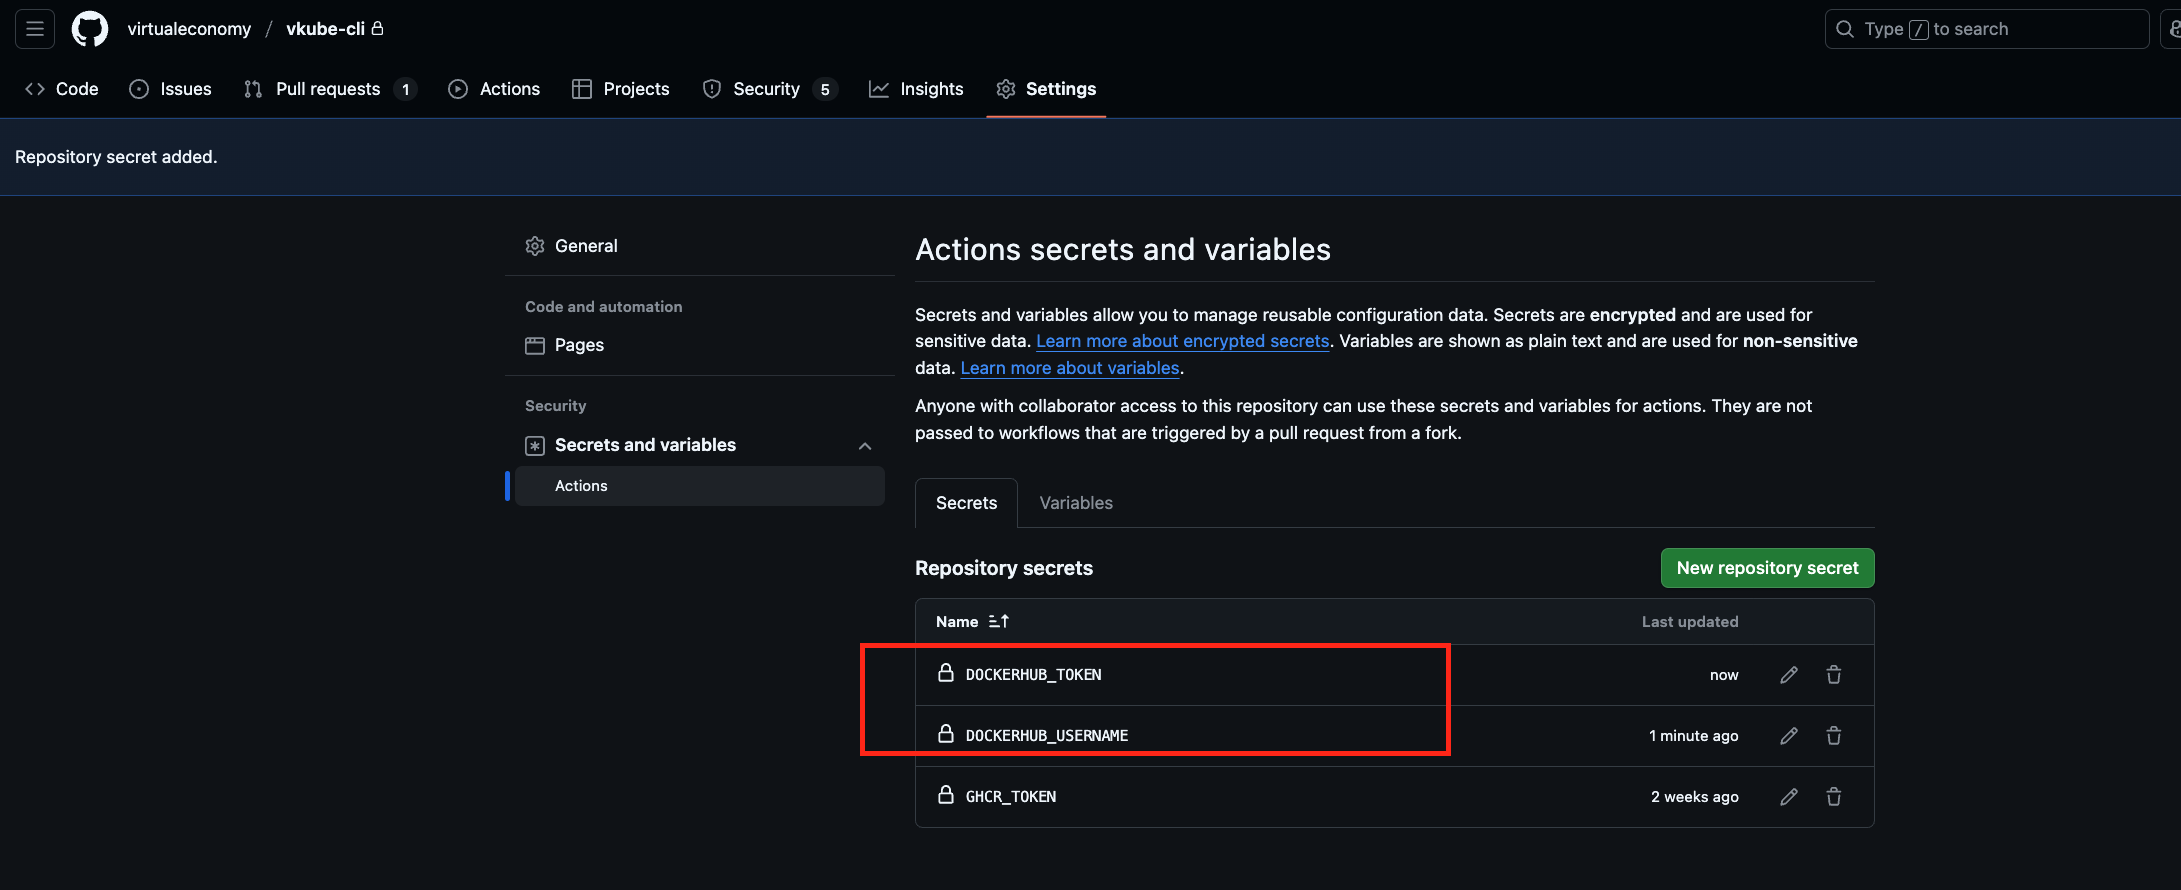
 If you set the imageRegistry to "docker" in VKubefile.yaml, then you need to configure the DOCKERHUB_TOKEN and DOCKERHUB_USERNAME like follows:
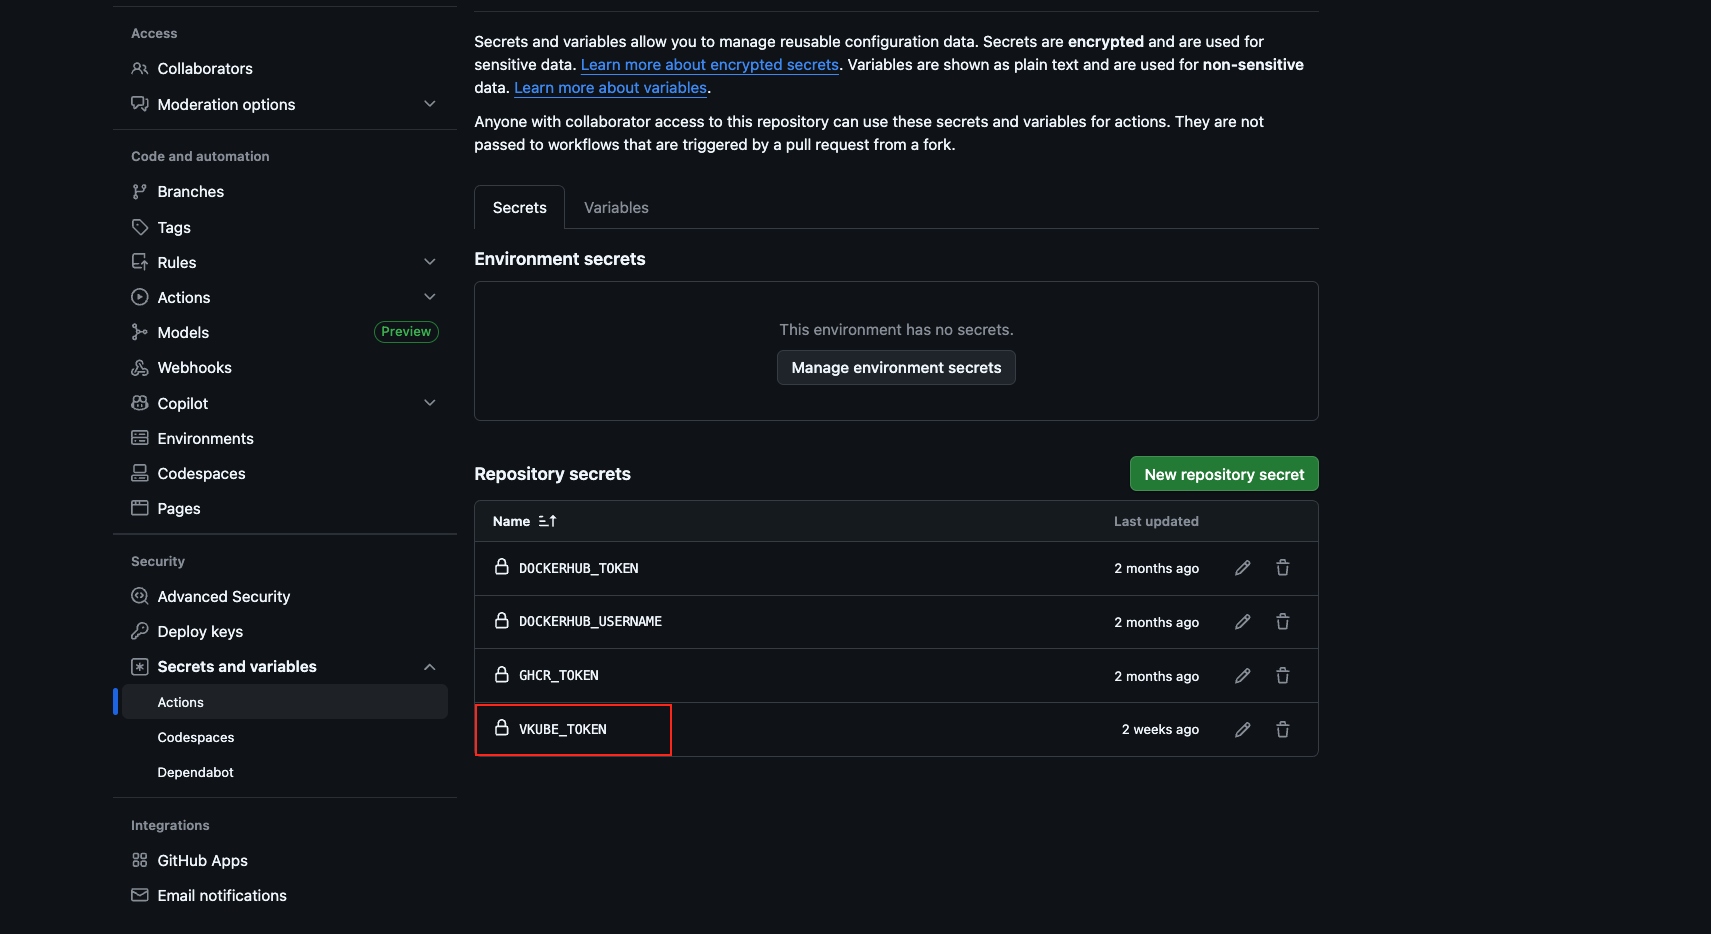
 To prevent vkube_token from being leaked, so you don't need to configure the "vkubeToken" field in VKubefile.yaml. But need to configure the VKUBE_TOKEN like follows:
Trigger the workflows
Merging into branch master via a Pull Request will trigger the workflows.
"git push origin master" will trigger the workflows.
You can set the new branch(current is master, you can set it to other,eg. dev, main...) to meet your needs in deploy.yaml.
name: Deploy with vkube-cli

on:
  push:
    branches: [ master ]
  pull_request:
    branches: [ master ]

jobs:
  deploy:
    runs-on: ubuntu-latest
Example
Project directory structure
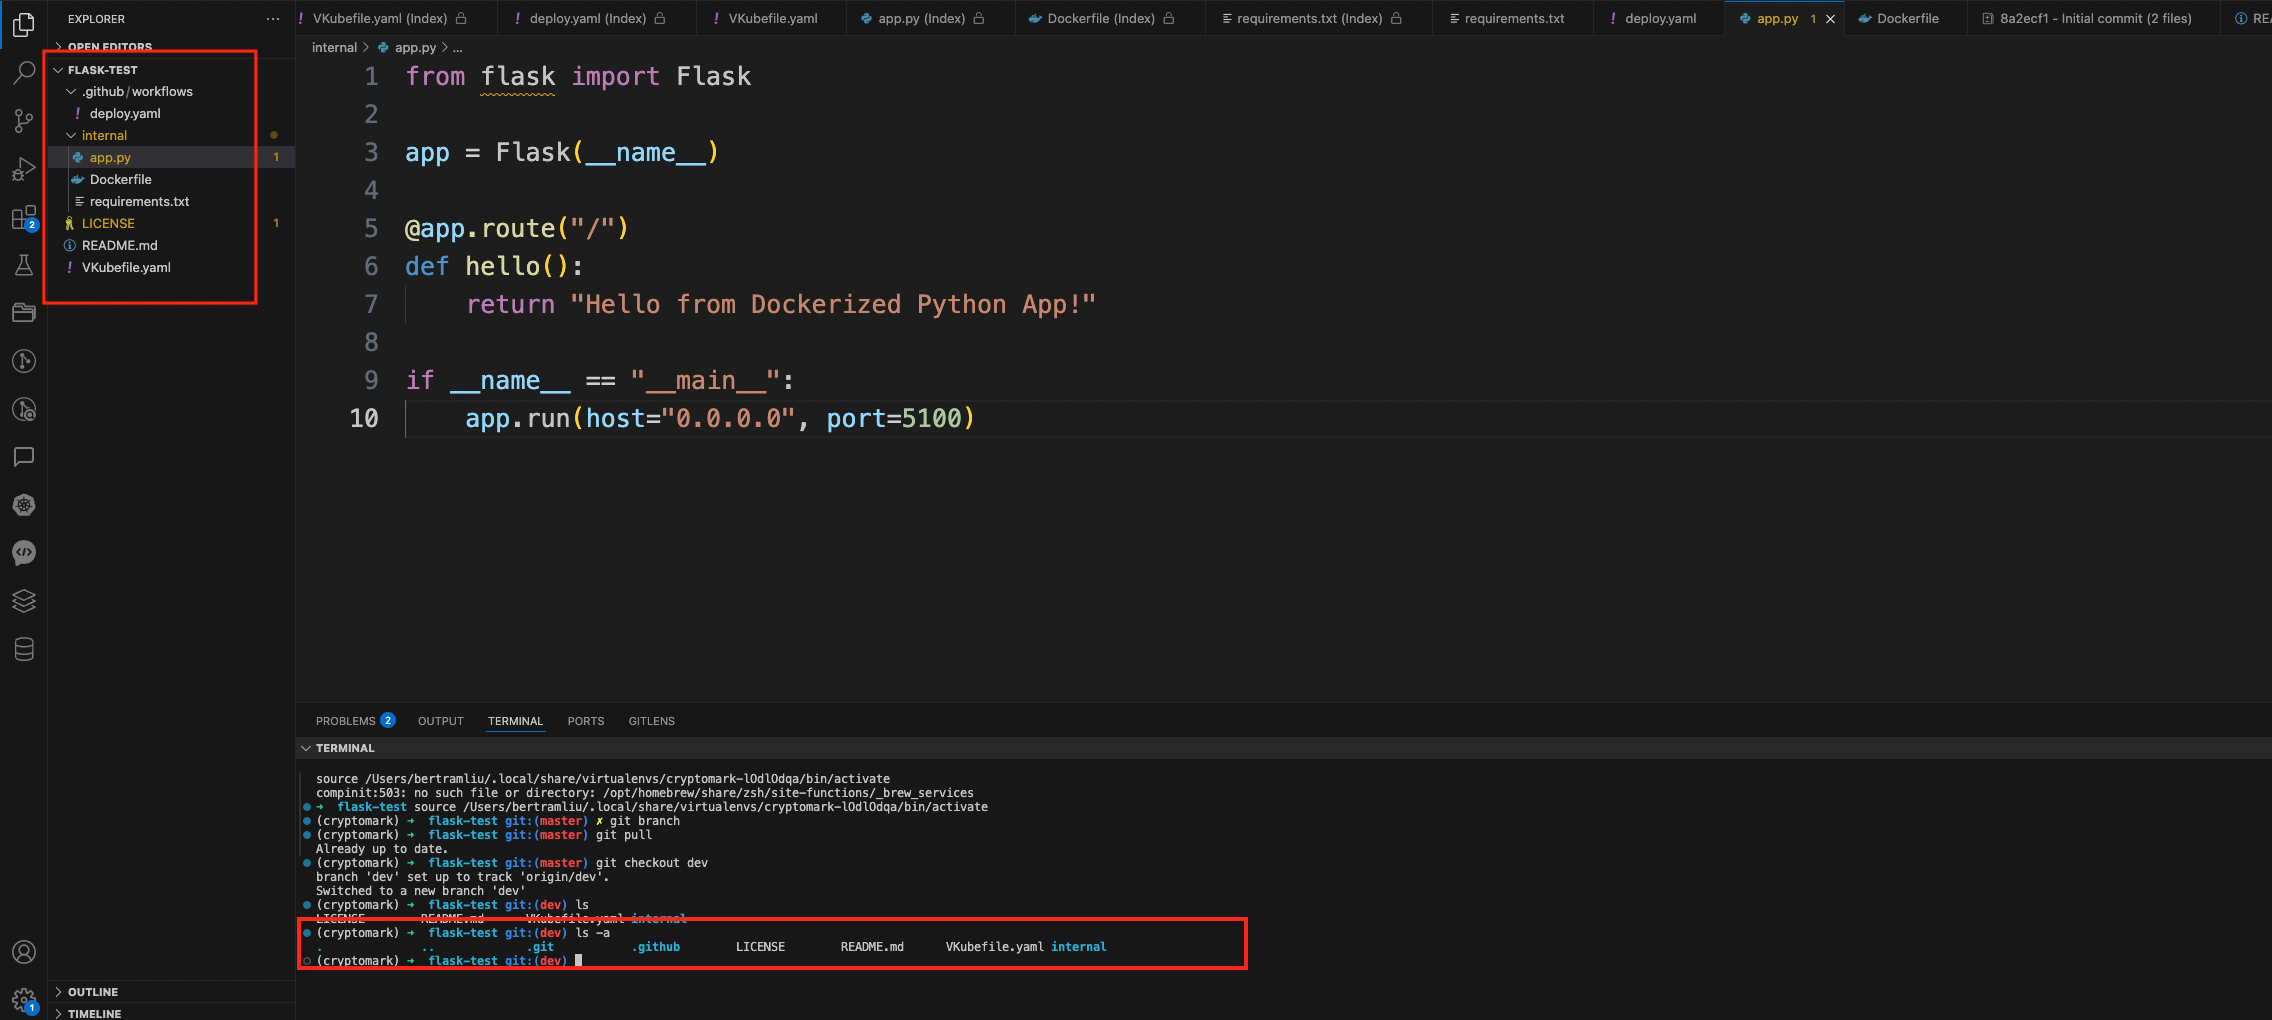
As shown in the above figure, in the red box on the left, you can clearly see that the root directory of the project is flask-test. Under the root directory, there is a VKubefile.yaml file; a .github/workflows directory containing a deploy.yaml file; and an internal directory. The content of the Dockerfile is as follows:
FROM python:3.11-slim

WORKDIR /app

COPY requirements.txt .
RUN pip install --no-cache-dir -r requirements.txt

COPY app.py .

CMD ["python", "app.py"]
app.py内容如下:
from flask import Flask

app = Flask(__name__)

@app.route("/")
def hello():
    return "Hello from Dockerized Python App!"

if __name__ == "__main__":
    app.run(host="0.0.0.0", port=5100)
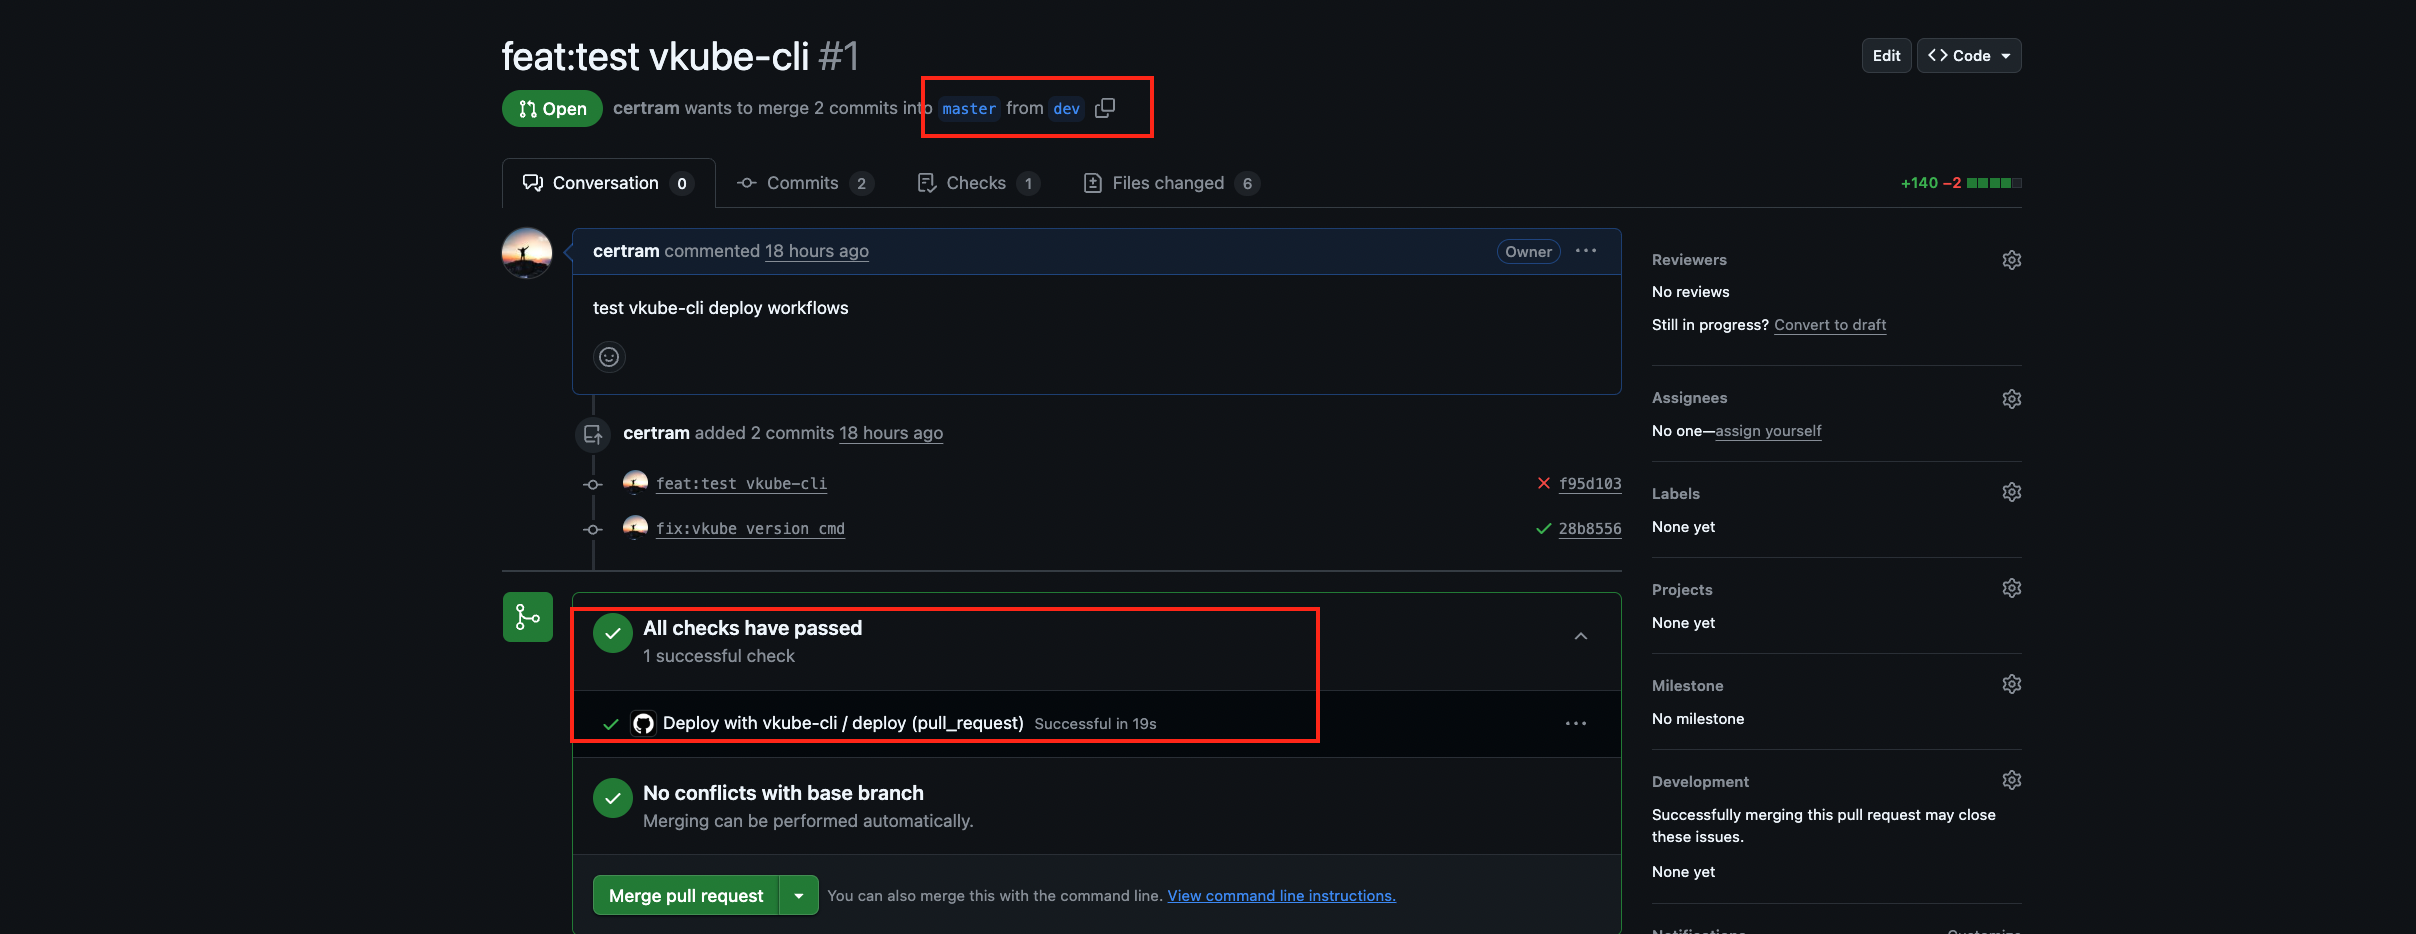
Trigger workflows
As shown in the figure below, when I submitted a Pull Request to the master branch, it triggered the workflow to perform the deploy operation. The second box shows the result, and a green check mark indicates that the workflow ran successfully.
Check the workflow process
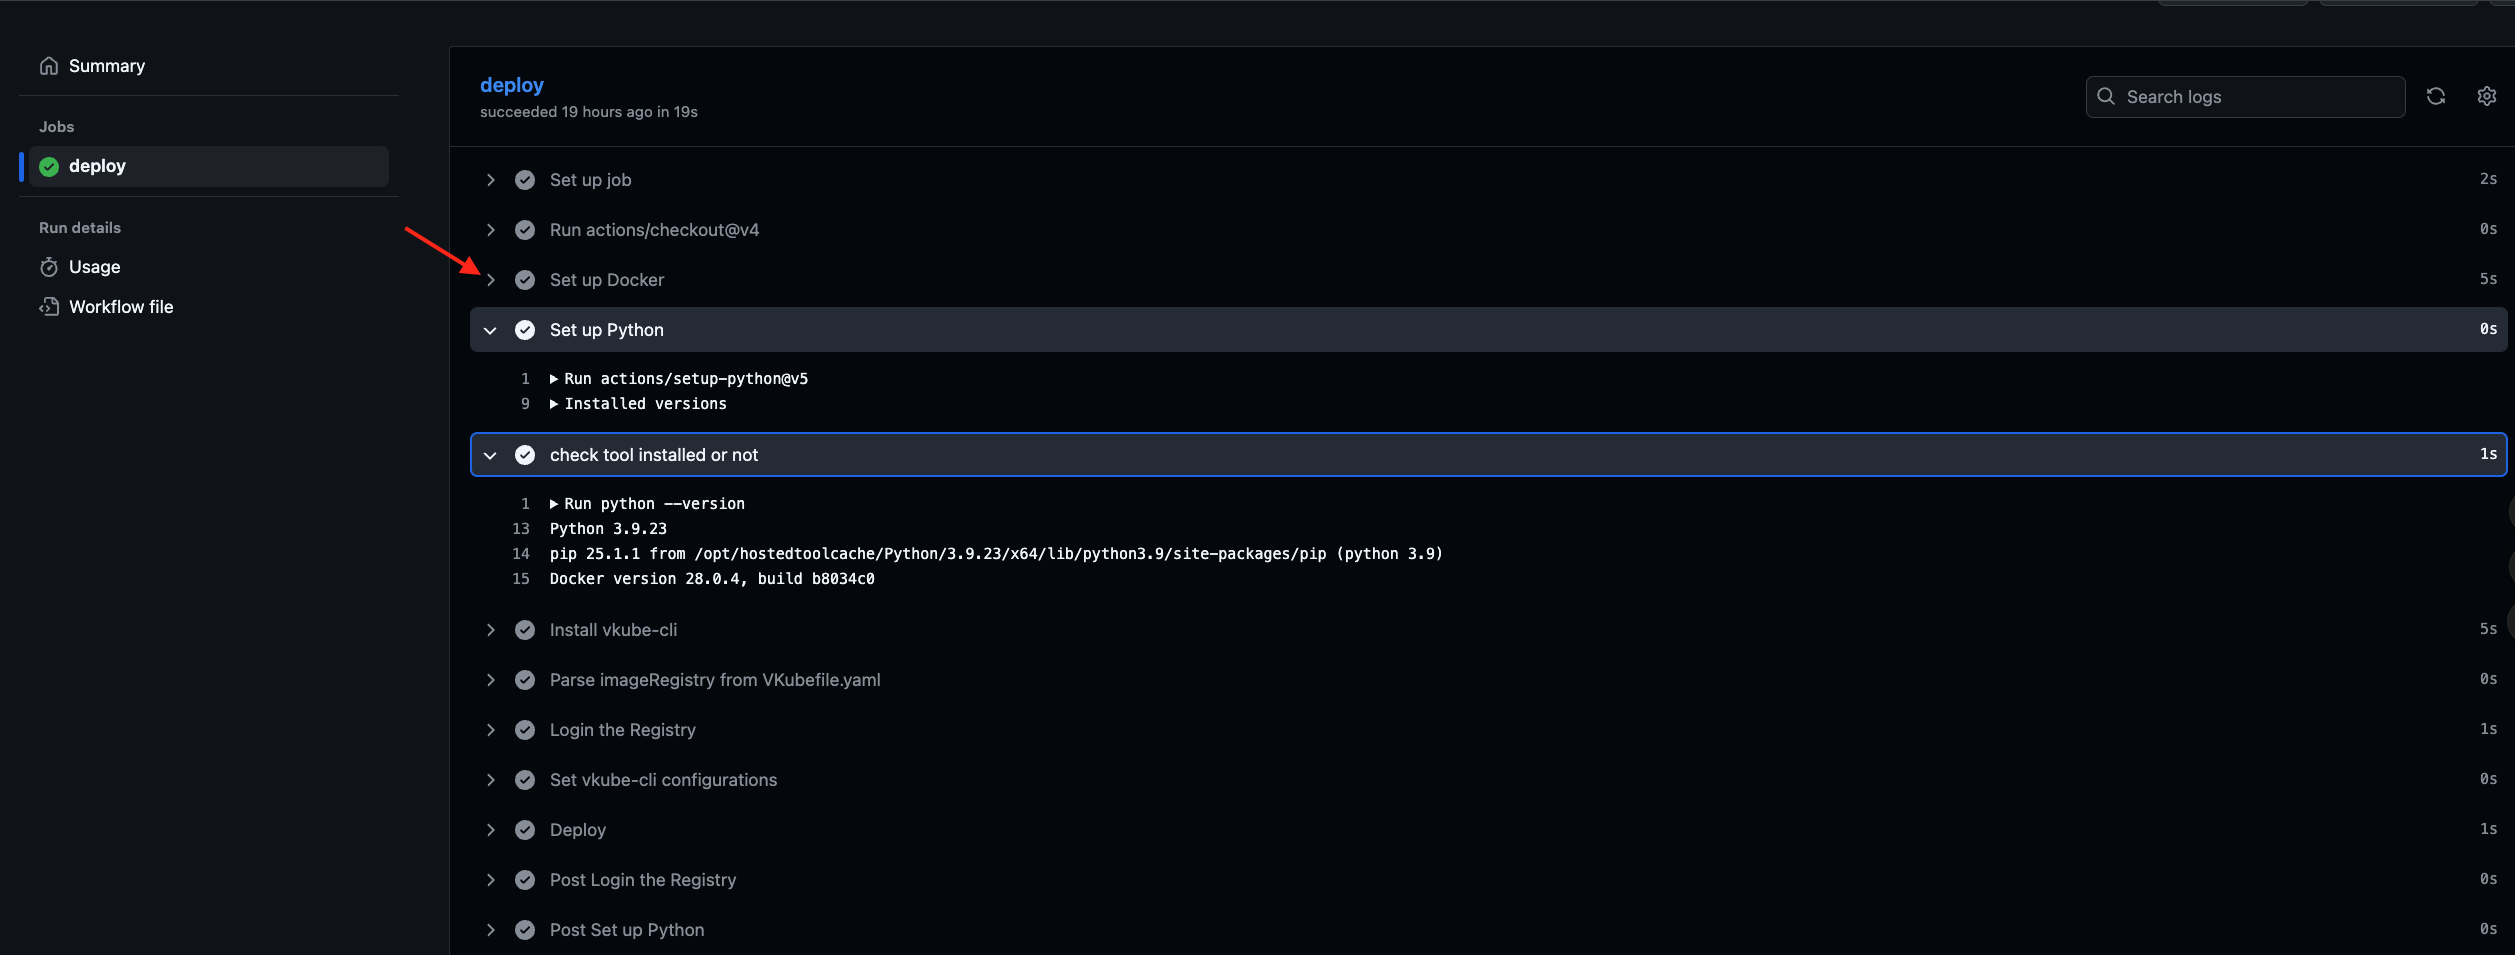
As shown in the figure 1 below, go to the GitHub repository, click "Actions", then click the latest workflow run. This will take you to the figure 2. Click "click here" to view Figure 3, and click the arrow to expand to see the specific log of a certain step.
Figure 1
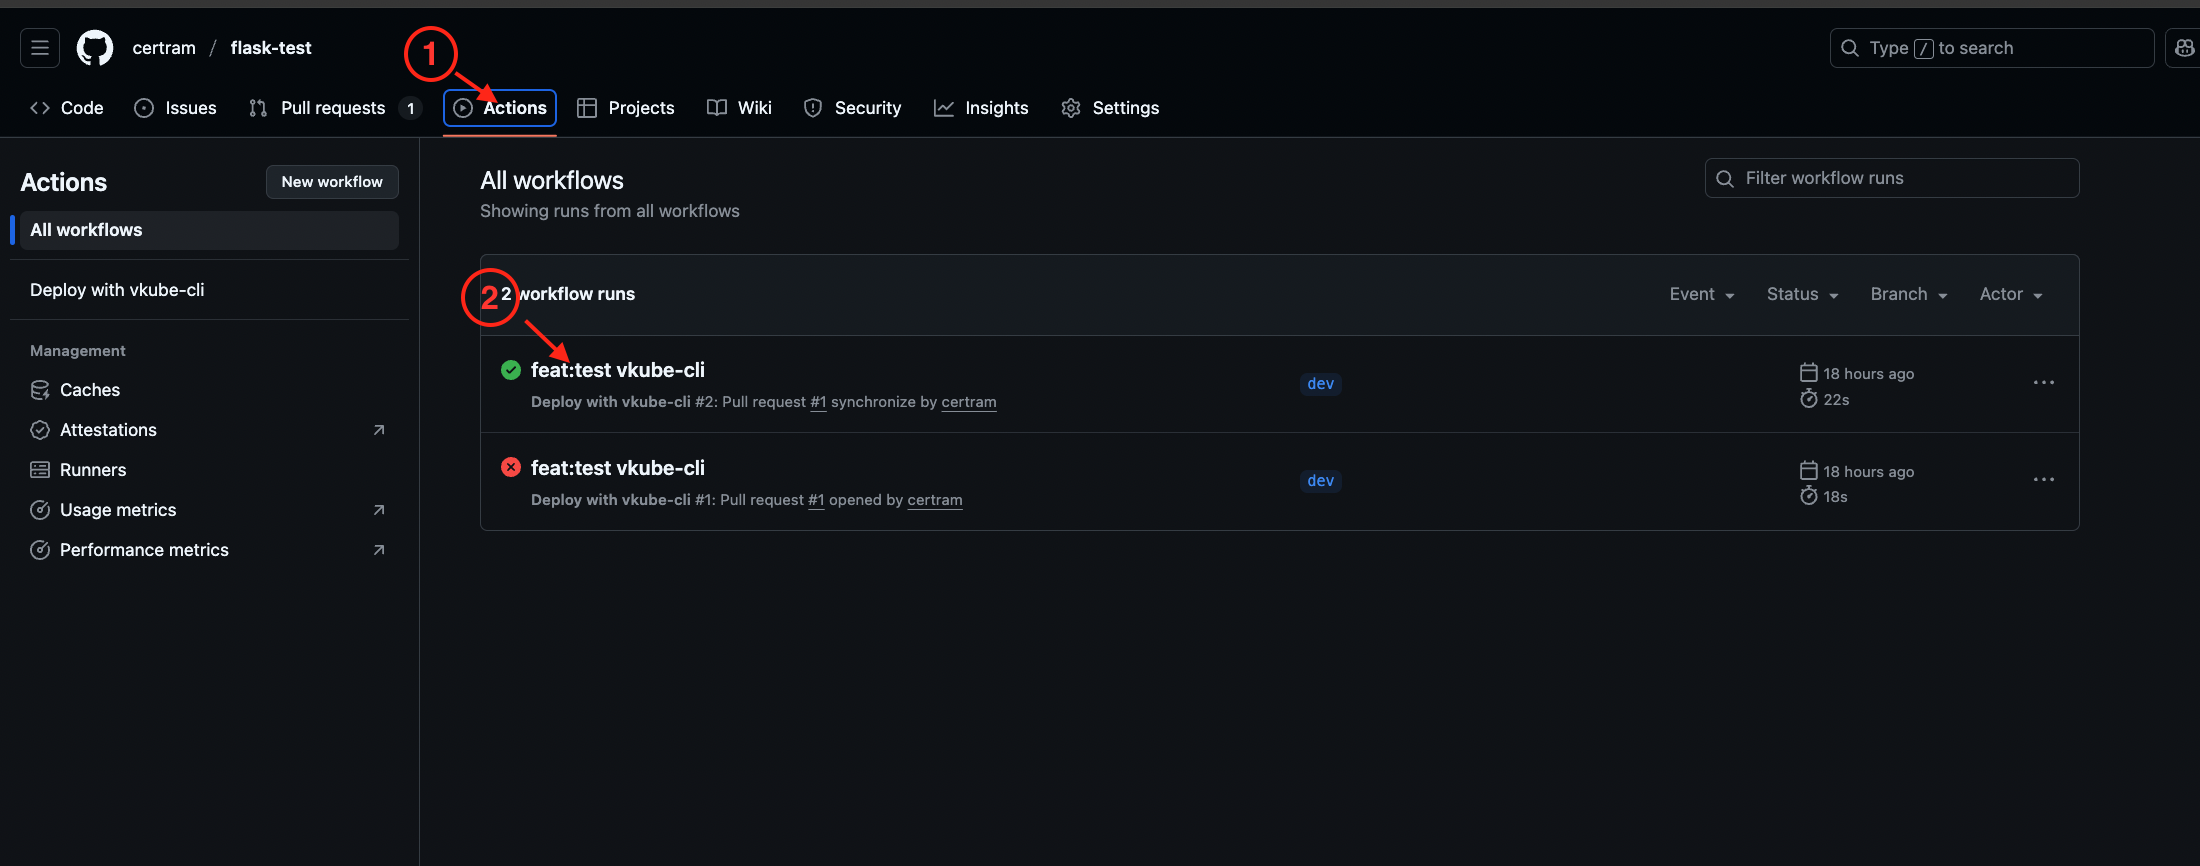
Figure 2
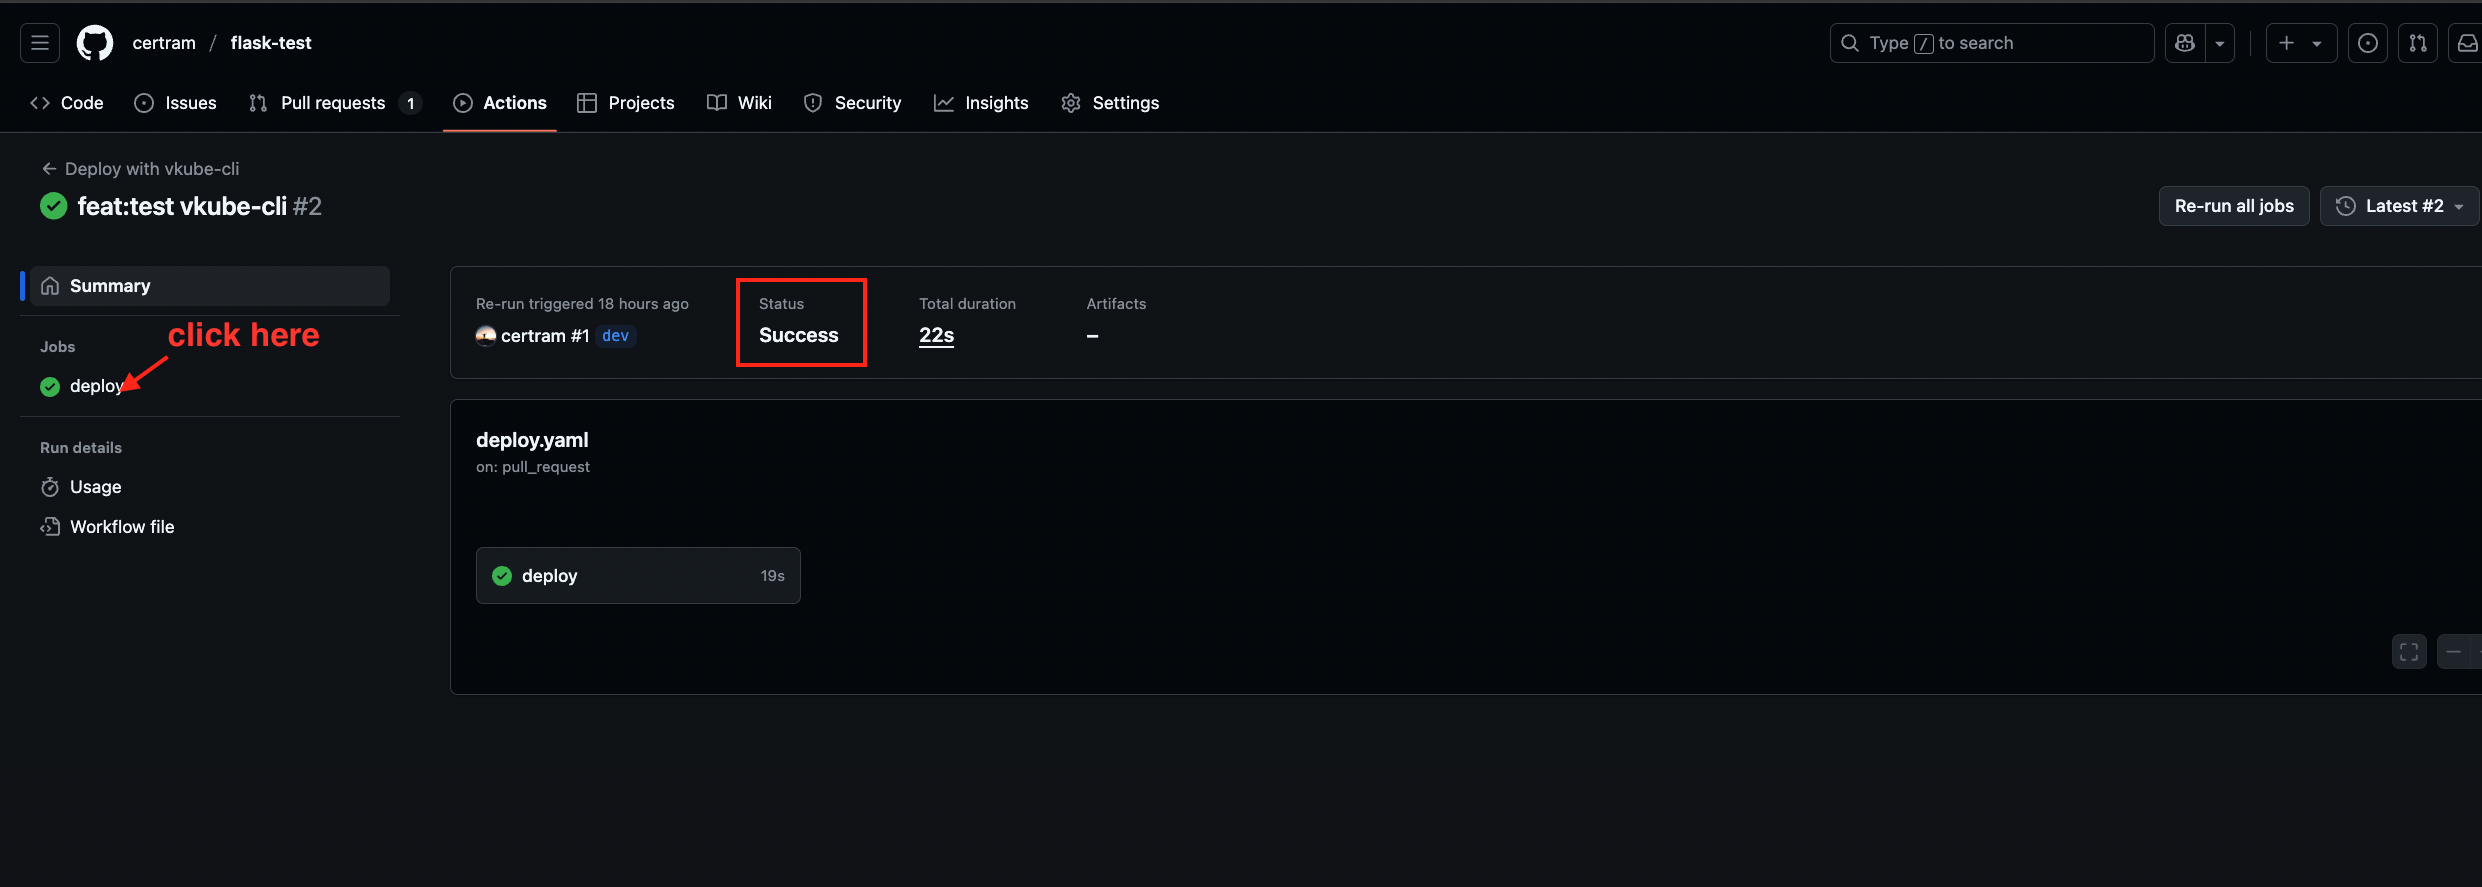
Figure 3